Quick & Easy Messenger “Party”

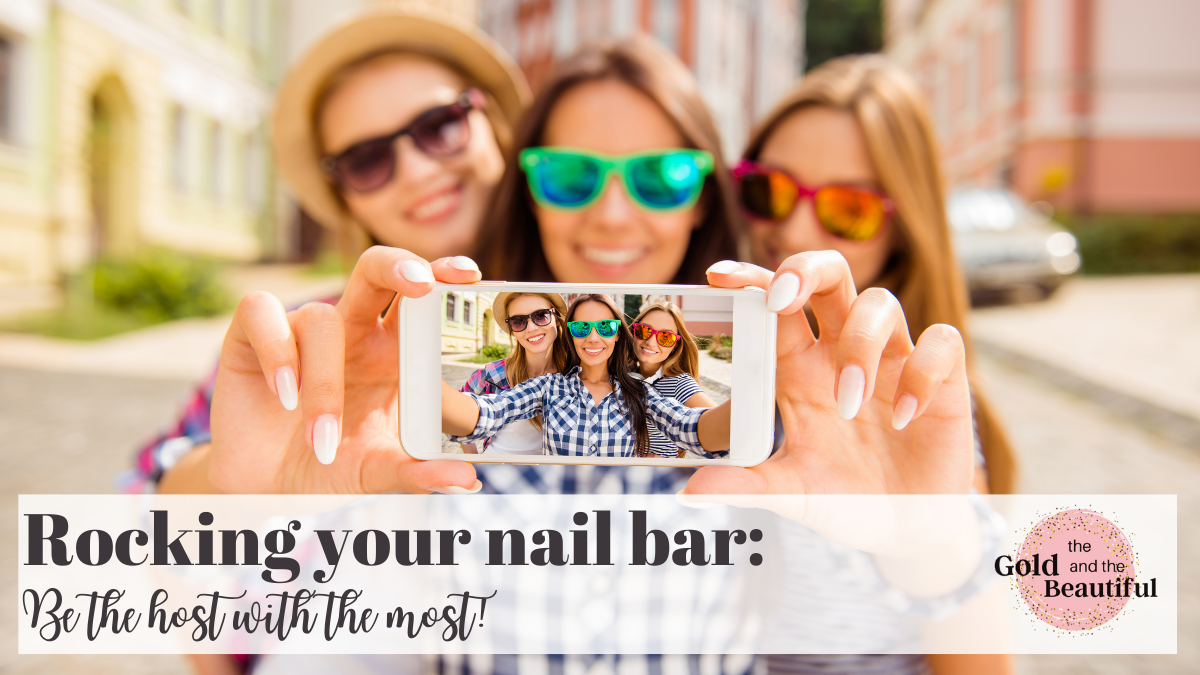
We all know that parties are the best way to meet new customers, hosts, and teammates. Plus, in social selling, it’s one of the best ways to be … well … social! But it’s easy to get tired of the “same old parties.”

One option that’s quick, easy and effective is a “party” on Facebook Messenger.

Best Target Audience

This type of party is GREAT for people who are already familiar with your products and services, but it can work for everyone. It’s also great because once you are friends with your guests, that 1:1 engagagement with messenger will help KEEP you seeing each others’ posts!

Duration

I ran my party over the course of three days, but you could adjust this based on what works for you and your host.

  • Day One – Host invites
  • Day Two – Party
  • Day Three – Follow Up/Prizes

Theme

Because it sounds a little strange to call a Facebook Messenger conversation a “party” I generally avoid this. Instead, I focus on the theme of the event. Examples of things that I’ve used are:

  • Fall Preview (to preview a new launch/collection)
  • Friendly Feud (fun question and answer game – great for individual engagement)
  • Trivia

Really, you could use any of the same themes that you would in any other party; the key is just to remember that the engagement is different and adjust accordingly.

Step by Step Guide

  1. Host coaching (day zero) – Talk to your host about what this will look like, when it will run, and how to invite guests. IMPORTANT: Please ask them to talk to their guests before adding them to the chat. The guests will still have to “accept” and if they mass add people, it makes it really difficult to see who is really in the chat and who was just invited. We want quality over quantity! If helpful, you can provide some examples of how YOU would invite someone (reminding them, of course, to use their own words – whatever is comfortable for them!)
  2. Create host link (day 0) – Create your party link and send to the host. Let them know that they can still share it with friends who aren’t able to attend the event. Also share the host rewards they could earn!
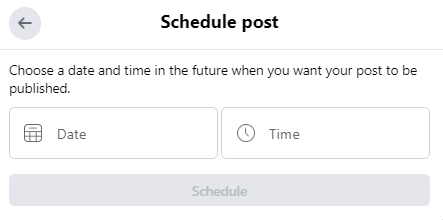
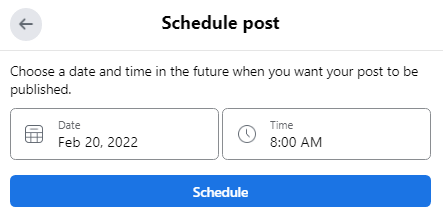
  3. Plan out posts/download graphics (day 0) – because messenger is more “real time” than traditional parties, I always try to have it planned in advance with my graphics ready in a folder. If I’m not sure I’ll be home, I’ll also download them to my phone. Since you can’t schedule them in advance, this is important!
  4. Create a group chat (day 1) with your host and one other person. I used my own other facebook profile, but you could add a friend or mentor as well. They can be removed after you get a third guest added. You’ll need to make your host an admin so they can “invite” guests to the chat. You can also use this time to set a fun theme and even change the little icon at the bottom.
  5. Welcome Post (day 1) – Create a welcome post letting your guests know what to expect. I generally include an overview, the time of the “event” (whether that’s a game, a preview, or something else), and a call to action for a prize. I usually start by asking them to send me a friend request and a message to say hi!
  6. Send Friend Requests & Initial Messages (day 1) – Even though you’re asking them to send you a request, if they haven’t, I usually send them one right away. (They’ll get the point if they accept it.) I always send a message to introduce myself and ask them a question. (Have they used our products? How do they know the host? Etc.)
  7. Send build-up questions (day 2). These can vary depending on what’s going on. I start with a point recap from the night before, remind them about the prize, and remind them to send or accept my friend request and send me a PM to catch up. I then post 3-4 questions throughout the day for participants to earn points. Examples include:
    • Poll about product knowledge/favorites
    • Roll Call (how do you know the host)
    • Product Posts with questions
    • Sample Requests
    • etc.
  8. Main Event (day 2) – I run this like I would a game night – fast paced for 30 minutes to one hour, depending on content. Depending on the tone of the group, you can have people answer in the chat; however, I HATE notifications and I find it gets hard to follow, so I USUALLY have people send their answers during the live portion directly to me instead of to the chat. (Again, this helps the algorithm, PLUS it allows me to have more personal conversation with the guests individually. For this and the build up questions, you can usually use graphics that were designed for a traditional online party.
    • If I’m doing a launch/preview event, I’ll share the new products and ask people to rate them. I vary the responses between:
      • Rating on a scale of 1-10
      • “Liking” the picture with an emoji to show how they feel about it
      • Using the emoji at the bottom if they like it
    • If I’m doing a game like trivia or friendly feud, I’ll ask the question in the chat and allow X minutes for them to respond to me individually. I give the first person to respond 2 points, and everyone else who is correct/on the board a point. That way there is a speed element as well as quality. After the time has passed, I’ll tag who was first and everyone who got it right. I will also tell them realtime when they answer too and include the answer graphic. (I usually don’t post this realtime in the chat so at the end I can give people time to “catch up.”
    • Game Night Special (day 2): After a few posts, I’ll offer a game night special. This could be free shipping, gift with purchase, etc. (but something to encourage them to make a purchase.)
    • Join My Team – About 2/3 of the way through the party I’ll post a “join” graphic and offer a point for sending me a PM with a question about my business. This is usually multiple points for participating.
    • Host Post: Near the end, I’ll offer a party booking game or a prize for hosting.
    • Join my VIP: I’ll wrap up by offering some special promo or points for joining my VIP Group.
  9. Thank You/Extend (day 2): I am usually tired AND want to give people a chance to catch up if they couldn’t play live, so I usually say I’ll be back the next day to post the prize. I’ll offer bonus points for purchasing from the host’s link.
  10. Follow Up Messages (day 3): I let people know when I’m going to give out the prizes, and if they haven’t responded to the prior posts, I’ll chat with them about the opportunities:
    • Join: Thank you so much for joining (name’s) fall preview! I hope you had fun. I really enjoyed our chats and wondered – have you ever thought about becoming a stylist yourself? (Then either have the convo, overcome objections, or move on to the next bullet)
    • Host: If the guest isn’t interested in joining: That’s fine! You can actually earn quite a few freebies just by being a host like (host name) did. We could do a similar event for you next week if you’d like to try to earn some free and discounted (products they were interested in!)
    • Buy: If they don’t want to join/host their own party – no worries! Well I’m going to leave (host’s) link open until _____ (date.) Did you want me to send you the link so you can do a little window shopping? Remind about any bonus points they could get with the purchase
  11. Winner! (day 3) draw for any prize winners and send out prizes.
  12. VIP/Party Closed (day 4): The next day, post a “this party is closed” or “the end” graphic and thank everyone for their participation. Send individual messages thanking them and asking if you could send a link to your VIP group (if they haven’t already joined.)
  13. Thank your host! Regardless of the outcome of the party, you probably met new people, made new friends, and had fun! So be sure you thank your host. If applicable, you can also let them know how close they are to earning rewards/reaching the next level and encourage them to share their link with friends and family!

The Power of “New” – How Trying New Things Helps You Grow!

Have you ever found yourself stuck in a rut, doing the same things day in and day out? We’ve all been there, and let’s be honest, it can get pretty dull. I know it’s easy to get in the habit of work, cook, clean, repeat. That’s where the magic of trying new things comes into play. Whether it’s something as small as trying a new shade of lipstick or as big as a vacation to a new place, stepping out of your comfort zone is like a breath of fresh air for your heart. In this blog post, we’re going to dive into why it’s crucial to embrace the unknown and spice up your life with new experiences.

1. New things keep life exciting!

Let’s face it; routine can be a drag sometimes. While I’m about as habitual as they come, doing ONLY the same thing day after day can make life feel pretty monotonous. When you try something new, you inject a burst of excitement and unpredictability into your routine. It’s like adding a pinch of salt to your favorite dish; it makes everything taste better!

2. Trying new things creates lasting memories.

While routines provide a sense of stability, they can also become stifling. Trying new things breaks this cycle. It’s like hitting the reset button on your life, allowing you to create lasting memories. You won’t remember the tv show that you watched last night ten years from now. But you will remember that time you laughed until you cried with a bestie. You’ll remember that special dinner with the hubs. These experiences become stories to tell, laughter to remember, and moments that make life truly special.

3. New things expand our horizons.

Michael likes to poke at me when I have my nose buried in my phone. He says “It’s a big ol’ world out here.” And he’s right. This Earth we call home is a pretty amazing place filled with countless opportunities to learn and grow. By trying new things, you open the door to new experiences, people, and ideas. You might discover a hidden talent or passion you never knew you had, or you might meet someone who becomes a lifelong friend. But you’ll never know if you stay safely within what you already know.

4. Trying new things builds confidence.

I’m not gonna lie – stepping out of your comfort zone can be pretty scary, but it’s a fantastic way to build self-confidence. When you try something new and succeed, even if it’s a small victory, it boosts your self-esteem and reminds you that you’re capable of so much more than you think. And guess what – even if you don’t succeed, you can still be proud of trying. Spoiler alert: even failing builds confidence, because you know you overcame your fear of trying! Over time, this newfound confidence can, and will, spill over into other areas of your life, helping you tackle challenges with a fearless attitude.

5. Trying new things prevents regrets.

One of the greatest fears people have in life is missing opportunities. We rarely ask ourselves “What would have happened if I didn’t try this?” But we often think, “What if I had?” Regrets can weigh heavy on your heart, so why not take a chance and just see where the path leads you? I love the tattoos that say “No regerts.” Even if it doesn’t work out exactly like you planned, you’ll have a great story to tell later.

So, there you have it—five fantastic reasons why it’s essential to try new things. If you’re unsure where to start, let me help!

  • Request a sample of Color Street dry nail polish. I know it sounds small, but that splash of sparkle on your nails could be just the confidence booster that makes a change in how you feel!
  • Want something bigger? Take the next step and join my Color Street team! The joy I’ve found by setting and meeting goals has been so fun and so fulfilling! And I’ve made so many new friends who inspire and motivate me every single day.

If Color Street isn’t your jam, it’s ok. There are literally no right or wrong answers here. It’s all about trying something new. Remember, life is meant to be lived to the fullest, and the best way to do that is by stepping out of your comfort zone and embracing the excitement of trying something new. Who knows what incredible opportunities await just beyond your comfort zone? Let me know what you find in the comments!

Welcome to the EU, Color Street!

I am so excited to welcome Color Street to Europe. As of 8/11/23, Color Street dry nail polish is available to all countries in the European Union!

What is Color Street?

Color Street is a beauty brand built on the foundation that one brilliant idea can change the world. Our founder Mr. Park changed the face of beauty with his innovative dry nail polish. It’s 100% real nail polish, but it goes on dry. It’s quick, easy, and long-lasting. Plus it provides the quality of a salon manicure or pedicure with the convenience of being able to do your nails anywhere – at home or on the go! And Color Street holds the global patent on 100% real nail polish strips!

How can I be a part of Color Street?

If you live in a country in the EU, there are three ways you can be involved!

  • Request a sample here! I will drop a two finger tester in the mail for you so you can see for yourself!
  • Host a party! This is a great way to get the opportunity for you and your friends and family the opportunity to be among the first to try Color Street dry nail polish! You can use the same form to request a sample, and just let me know in the comments that you’d like to host a party! Plus, you have the opportunity to earn host rewards for free and discounted products!
  • Join my team! Whether you are looking to build a business or have a side-hustle, being a stylist is a great way to earn money by selling products that you love! I have been a stylist for almost four years, and I’m happy to help you get started!
  • Earn 15-35% commission on Beauty Social, one-on-one, online and event sales
  • Join and grow a Stylist community of motivated, brilliant individuals (we’re pretty fun too!)
  • Earn special rewards and incentive trips

The Color Street starter kit includes everything you need to get started. It’s € 119 and comes with over € 275 in products and business supplies!

Is it easy? No. Is it fun and rewarding? I think so! With Color Street, you have an opportunity to earn income, but it takes hard work to make a substantial income in this business and a Stylist’s success depends largely on their personal commitment, hard work, business skills, and market conditions. A Stylist’s income is not representative of future results and Color Street does not guarantee any income or rank success. You can view the full US income disclosure here!

Frequently Asked Questions

  • How much are Color Street nail polish strips? Sets range from €15.49 – €17.89.
  • As a stylist, is there a requirement to keep inventory? No! Once you are a stylist, you pay a small monthly e-suite fee that provides customers the ability to order products directly through your website, so there’s no need to keep inventory onhand.
  • Will Color Street be available throughout all of Europe? No. Color Street will only be available in the European Union countries, namely: Austria, Belgium, Bulgaria, Croatia, Republic of Cyprus, Czech Republic, Denmark, Estonia, Finland, France, Greece, Hungary, Ireland, Italy, Latvia, Lithuania, Luxembourg, Malta, Netherlands, Poland, Portugal, Romania, Slovakia, Slovenia, Spain, and Sweden. (PS: We are also available in the US and Canada!)
  • What will be included in the Starter Kits for new EU Stylists? The Starter Kits will contain 13 Sets of nail strips, 72 2-Finger Testers, 100 prep pads, 2 large nail files, 2 nail buffers, 60 mini nail files, 50 cuticle sticks, 25 catalogs, 25 Opportunity Brochures, a Stylist Launch Guide, and a Tote Bag.
  • How much will shipping cost? How long will it take? The shipping costs will vary by weight. The anticipated timeframe for delivery once the shipment has left the warehouse is 2-3 working days.
  • Will customers or Stylists be charged any additional customs fees or duties upon delivery? No.
  • What languages are available? In Germany and Austria, materials and customer service are available in English and German. For all other EU countries, these are available in English.

Have more questions? Please contact me. I’d love to chat!

Updated: Nail Polish Removal Hack

One of my earliest blog posts was about a nail polish removal hack. Let’s face it… since Color Street polish has a built-in base coat, color and top coat, it LASTS! And that meant that it could take a minute to remove it.

However, just like our founder Mr. Park saw a problem with traditional nail polish and solved it, he decided to solve the problem of nail polish remover too! So guess what – no hack required!

We now have our own nail polish remover, and it’s AMAZING. And here’s why…

It’s powerful.

It doesn’t require soaking or scrubbing or wrapping to get the polish off. Not even with multiple layers. You just hold a soaked pad over the nail for a few seconds, and then BAM. Polish is removed.

It smells great!

I mean, I’m not going to wear it for perfume; however, instead of that strong acetone scent, you get a nice bergamot scent instead. I notice after I remove my polish I occasionally catch a faint whiff and I think, “Hmmm what smells nice?” And then I remember!

It’s acetone-free.

Acetone can be rough and drying on your nails, and it can contribute to peeling and weakness. Color Street nail polish remover moisturizes your nails and helps them stay healthy.

It’s leak-proof.

I had a nail polish remover fiasco in our camper with another brand. On a bumpy road, it tipped over and spilled, making the whole camper smell like nail polish remover for weeks! Color Street designed a special lid designed to minimize leaking. So far, I’ve had no other incidents in our camper, and we’ve had some rough roads!

What’s your biggest challenge when removing your polish? Let me know in the comments below.

If you’d like to try Color Street remover for yourself, pick it up here!

Scheduling Facebook Posts

One of the biggest behind-the-scenes tricks that I have learned as a Color Street stylist is that you can pre-schedule posts to your Facebook groups (as long as you are an admin or moderator!) This means you can engage with your audience when THEY want to engage, whether or not it’s convenient with your schedule!

To schedule posts on a PC, the steps are simple.

(Scroll down if you prefer to watch a short video!)

  1. To begin, click to create a post like you normally would.
Start by writing a post like normal.

2. After you’ve typed your post and added any pictures, instead of clicking the blue “Post” button, click the small calendar to the right of it.

Click the small calendar icon to schedule.

3. You’ll be prompted to choose a date and a time you want to schedule the post. It must be at least 30 minutes in the future.

Input a date and time.

4. After you’ve put in a date and time, you can click the blue “Schedule” button at the bottom.

Choose your date & time; then click “Schedule.”

5. When you return to the main page, you can view your scheduled posts by going to “Scheduled Posts” in the Admin Tools panel on the left side of the page.

Find your scheduled posts in the admin panel.

6. From within Scheduled Posts, you can do several things to your post. Just click on the three dots in the upper right corner of the post to access the menu. The most common ones I use are:

  • Reschedule post (to change the date and/or time)
  • Post now (to post it immediately)
  • Edit post (to add/change the post)
  • Delete post (if you’ve decided you no longer want it)
Click on the three dots next to your scheduled post to access the menu to make changes.

If you prefer to watch a video, here’s a quick video that walks through exactly how to schedule!

Check out this short You Tube video on scheduling Facebook posts!

Scheduling posts has been a real game-changer for my business. I’m an early bird, so I get up early and schedule most of mine before I start work in the mornings or on weekend mornings while I wait for my husband to wake up!

Tell me in the comments: when do you usually schedule your posts?

Creating a Facebook Group (pc)

If you’re creating an online Facebook group for a party or your VIP group, here are the steps I take to create it! I was using a PC, and from time to time, the steps will change slightly, so feel free to comment if you notice something has changed!

  1. Open Facebook to your home page
  2. Click on “groups” on the left side of your screen
Click on “Groups” on the left side of your screen.

3. Click on the blue “Create a new group” box on the left side of your screen.

Click on “Create a new group.”

4. Choose a name for your group. Remember, you cannot use the words “Color Street” or any variation in the name. Be sure to check your policy & procedure document for branding guidelines.

5. Set the privacy to “Private” (no discounts or giveaways in public forums!)

6. Click “Create.”

7. Once your new group opens, scroll down to Settings>Group Settings on the left.

8. Set the name and a brief description of your group. Then click “save.”

Set the name & description for your group.

9. Scroll down and choose a custom web address for your group. It should be something easy to remember (and spell!) Then click “save.”

Customize the web address for your group.

10. Set your membership rules so:

  • Only profiles can join the group (not pages)
  • Only admins and moderators can approve member requests
Set your membership rules.

11. Set “Approve all member posts” to ON. (This is good hygeine because sometimes people will post un-related spam to groups to get “credit” for sharing. You’ll want to keep the conversations relevant and on topic!

Set “Approve Member Posts” to on.

12. Scroll up to the top and click on “Home” and then “Edit” on the cover picture.

On your home screen, click “edit” on your cover picture.

You can create your own cover photo in a graphics app (I prefer Canva!) or many graphics groups will take requests for cover graphics.

Once you save your cover photo, your group is now set up!

If you are a visual person, here’s a short video that walks through the process!

Optional: You can also set up membership questions. Although not everyone will answer them, it’s helpful to get to know your members!

For a mega party with multiple hosts, I always ask who invited them!

Other membership questions might include:

  • Have you ever tried Color Street?
    • Yes, I LOVE IT!
    • No, please send me a sample!
    • Maybe once or twice???
  • Would you like more info on:
    • Becoming a Color Street stylist
    • Hosting your own party
    • Just checking things out for now

To do this, just scroll down in your left-hand admin panel to “Membership Questions” and click the blue “Add question” button.

Add membership questions to your group.

From there, you can choose a type of question (Checkboxes, Multiple Choice, or Written Answer), add your question, and add your options (if applicable.)

Choose a type of question (Checkboxes, Multiple Choice, or Written Answer).

I hope you found this helpful! Once you’ve set up your group, feel free to drop the link in the comments below! I’d love to see what you created!

Rocking your nail bar: be the Host with the Most!

Are you hosting your first Color Street party? Or maybe you’re a new stylist trying to help your hosts succeed! Below are a few simple things to remember when hosting a Color Street nail bar!

Don’t overthink it.

There are thousands of different ways to host a party. It’s most important to do what’s fun! Do you have lots of girlfriends that you spend time with? Then maybe it’s best to have an in-person nail bar! Does the idea of hosting people in your home send your anxiety through the roof? (That’s me.) Then perhaps a Facebook party will be your jam. Did you recently move and you’re missing your friends and family back home? Do a zoom party with them so you can catch up. What sounds FUN to you? THAT is what you should do!

Invite your guests personally.

We’ve all been mass added to a group. You see that notification pop up and it says “Long Lost grade school friend invited her to Sally’s XYZ party.” You haven’t heard from Sally since, well, grade school. And now you can’t help but think, “Why should I buy something from Sally now?” The week that my dog died, I had no less than 3 people reach out and ask me to be an ambassador for their dog bandanas. It was awful. The invite can be short and simple, but at least they know you didn’t just randomly click their name on a list! You can even use the same core message and just tweak it…

Hi, _____! I’m having a Color Street party this week, and I’d really love it if you could come and play along. ____________________. Can I send you an invite?

Then you tweak that invitation for your friends and family:

  • Hi Mom! I’m having a Color Street party this week, and I’d really love it if you could come and play along. I promise it won’t be like the Home Interiors party where you were my only guest! 😉 Can I send you an invite? (Yes, that really happened btw.)
  • Hi Sally! I’m having a Color Street party this week, and I’d really love it if you could come and play along. I remember all the fun we used to have in grade school painting our nails, and I thought this might be a fun way to reconnect. Can I send you an invite?
  • Hi Donna! I’m having a Color Street party this week, and I’d really love it if you could come and play along. You are the most fun neighbor ever, and you crack me up on Facebook. It will be so fun! Can I send you an invite?

Interact & play along!

Whatever type of party you have, it’s important that you show up! Imagine if you were hosting a birthday party at home. Your guests all show up, but you aren’t there. You’ve gone to the movies! Especially with online events, it’s easy to let life sneak up on us and we get distracted. But be sure your guests see you playing along. They know YOU, not your stylist (yet.) So get in the mix and have a good time! The more you interact with your guests, the more fun they will have!

Encourage your guests to get (and try!) their two finger testers.

As a stylist, I don’t ever want people to buy something out of guilt. Sure, it’s nice when people say “Oh, I’ll buy to help my friend.” But I sell Color Street because it’s an amazing product and it makes people so happy when they wear it! And the single best way for people to fall in love with Color Street is to try it. If you are hosting a party for me, there will NEVER be pressure to sell. We’re not here to sell. We’re here to share. So encourage your friends to put on a twosie! If they’re local, you can even help them! Get them to take a nailfie! Oooh and awe over how cute it looks. Enjoy it!

Thank your guests for coming!

Back to that birthday party… you would always thank your guests for coming! The same is true if they come to your online party or nail bar! We appreciate them!

My pet peeve is when someone asks me to host a party, and they say “I’ll do all the work for you.” I want to answer, “Well then it won’t be a very good party, will it?” Don’t get me wrong… hosting a Color Street party isn’t HARD work. But you also can’t just hit the invite button and then forget about it. That’s not a good experience for anyone – you, your stylist, or your friends. So be there. Be engaged. And MOST IMPORTANTLY, have fun!

Have you ever hosted a Color Street nail bar? Want to give it a try? Comment below, or join me on Facebook to get started!

Getting Down to “Business” – Business Posts

I don’t like selling. There, I said it. I would never be good in a high-pressure sales position. But… I do love sharing what *I* love. And I love my business. So here’s how to share your business WITHOUT being salesy.

Don’t overshare.

If you haven’t yet, go back and read Social Media 101: Audit Your Profile. You should have 4-5 “pillars” that you’re posting about regularly. If not, start today! You want to post regularly enough that people know your business, but remember: that’s not ALL you are! You are so much more, and so it’s all about balance. I suggest 80% personal, 20% business.

Share business blessings.

A “business blessing” is what we call something good about your business. There’s no perfect style or length -the only requirement is that it’s authentic. Think about your business and what makes you truly happy and grateful. That’s what you should post. When possible/appropriate, include a picture of yourself. The post could be about your product, your team, your experience, something you’ve earned…just be sure you follow the policies and procedures when discussing any income or benefits!

Here are a few examples of different business blessings I’ve posted:

Recognize your team.

If you don’t have a team, recognize your peers! There is NOTHING – I repeat – NOTHING better than shouting out someone you admire and respect. It makes them feel good. It makes you feel good. And it’s a wonderful way to highlight some of these amazing people we get to interact with in our business!

Here are a few examples of shout outs that I’ve done… The first one was recognizing my team, but the last one is recognizing a peer!

Share product posts.

These are actually my LEAST favorite types of business posts. I will share a product post when there’s a new launch or a holiday launch I’m really excited about. I’d much rather just sprinkle my nails into stories and posts about OTHER things! (Nailfies are really easy to do that with!)

Here are two examples of “product” posts that I did. The first was a video highlighting a new collection. The second was me actually talking about something not related, but I did my nails at the same time!

https://www.facebook.com/amelia.barker1/videos/199381799001999

https://www.facebook.com/amelia.barker1/videos/368835054841851

So, take your pick; change them up. You don’t have to be “salesy” to sell.

What’s your favorite type of biz post? Let me know in the comments!

Team Mega Parties

One of the things that can be done within Color Street teams is a mega party. This is a great way to jump start your business (plus have a lot of fun!)

What is a mega party?

A mega party is much like a regular party, but multiple stylists come together and invite guests!

What’s so great about a mega party?

Besides the fact that they are fun, mega parties are a great way to build up enthusiasm in your customer base! As a stylist, I almost always have sales made and parties booked during a mega party. I have also had new people join my team during them! It’s also good because you don’t have to do all the posting/scheduling/follow up!

As a customer, this is FUN! They get to be around other customers who know and love Color Street as much as they do. They get to do something “extra” that not all of your customers/VIPs have the chance to do. And playing games and winning prizes is amazing!

How many people can participate in a mega party?

You can have small 2-3 stylist mega parties or you can have huge mega parties! I’ve found that it’s the most fun when there are at least 10 stylists who invite 10 guests each. That’s a great mix that’s not overwhelming and it’s a lot of fun!

How does a mega party work?

Please note, this will vary depending on team and who is hosting the mega party. The following has been my experience:

  • Leadership within the team will set a date and criteria
  • Stylists generally will pay a nominal fee to participate, and this fee is used to buy prizes to give away during the party.
  • Stylists will be given a date when they can invite people to the group. Prior to that, you can hype it up and verbally invite people; just don’t send out the link yet!
  • Your leaders will tell you these key dates:
    • When you can invite people to the group
    • When posts will start and end
    • When points will be due
    • When prizes will be announced
  • Typical posts that your leaders will post in the party might be:
    • Welcome
    • Icebreaker/Who Invited You
    • Favorite Color Street Set
    • Prizes
    • Game Night/Girl’s Night In
    • Thank you
    • Winners

What are YOU responsible for?

As a stylist participating in the mega party, here are the things you will need to do:

  1. Pay any entry fee
  2. Invite the suggested number of guests
  3. Set up a group chat to generate excitement and make sure your guests see the prize posts when they are posted
  4. Interact with the posts & guests (and help answer questions – even if you didn’t invite someone! One of the most amazing parts of these is getting to interact with other stylists!)
  5. Keeping track of points for the mega prizes.*
  6. Submitting points by the required deadline
  7. Obtaining the winner’s shipping info if they are on your invitation list and win something
  8. Thanking your guests for coming!

*What types of prizes are usually given out?

This all depends on the team that’s hosting the party, the number of participants, etc. But when my team does a mega party there are usually two types of prizes:

Mega Prizes: These are usually the bigger prizes purchased with funds from the entry fees. Usually, there are a few limited ways that people can be entered to win a mega prize:

  • Host/Schedule a party with you
  • Make a purchase from you (they’ll use your shopping link directly.)
  • Ask a question about being a stylist

Participation Prizes: These are usually random prize drawings based on participating in the girl’s night in/game night. You would generally not be responsible for tracking points associated with this!

Remember – you can never make it a requirement that people purchase or join your team in order to win! Also, you can never offer any prizes or discounts in a public forum! Always refer to your policies and procedures to ensure you remain in compliance!

Who should you invite?

You can invite anyone you’d like! But, here are some of the people that I would typically invite:

  • Potential Stylists: This is a great forum for people to get a taste for how fun your team is! They can also get questions answered from other stylists.
  • Customers who you’d love to host a party: There are usually posts associated with parties, and this is a great way to get them excited to host!
  • Top Contributors in your VIP group: This is a great way to say thank you!
  • Customers who generally order but haven’t ordered in a while: this could be their reminder to purchase!

What should you say?

There’s no right or wrong way to invite to a mega party, BUT, one thing is certain – you should send INDIVIDUAL invitations. Just making a post and hoping someone will a) see it and b) respond to it is NOT effective. Here’s an example of what I might say:

Hi Amy! I really appreciate you being a loyal Color Street customer and top contributor in my VIP group! My team is hosting a mega party next week with some super cool prizes, and you don’t have to buy anything to win! I only get ten invites, so I thought I’d see if you wanted to come play along! Would you like me to send you an invite?

Have you ever been a part of a mega party, either as a stylist or a customer? What did you think?

Making Connections: Meet “Frank”

One of the most common objections I hear from people who are thinking about joining my team is “I don’t know very many people.” To that, I have a three part response:

  1. You know more people than you think.
  2. If you are building a business, you won’t need to rely on just friends and family for your business to grow.
  3. You will meet new people!

However, it is easiest to begin with people that you do know, and here’s how!

Make a “FRANKs” list.

Get a blank piece of paper or start a spreadsheet – whatever works for you to brainstorm. Just make sure you have plenty of room! We’re going to break down the list of people you know into five categories starting with…

F = friends

Start with your besties, of course. They will most likely be your cheerleaders, whether or not they use your products! But then dig deeper:

  • Work friends
  • Church friends
  • Elementary school friends
  • High School friends
  • College friends
  • Facebook friends
R = relatives

Think about what relatives you might have that would be willing to try Color Street. I’ll focus on women since that’s our largest demographic, but if you have a forward-thinking guy, let him try it too! (It’s a whole untapped market!)

  • Mother
  • Grandma
  • Sister
  • Aunt
  • Nieces
  • Cousins
  • In-laws
A = aquaintances

We all have aquaintances. These are people we may not know well but that we recognize or encounter regularly!

  • The person who works at the front desk of the gym
  • The bank teller
  • The grocery store clerk (you know, the friendly one whose line you always look for!)
  • Co-workers you may not know personally but you see regularly
  • Restaurant workers/Bartenders
N = neighbors

Depending on where you live, you may or may not know your neighbors well. But there’s no time like the present to meet them!

  • Current neighbors
  • Past neighbors
  • HOA members
  • Apartment office staff

And you can check with your HOA or apartment management company to find out if there are options for you to connect with your neighbors:

  • Neighborhood business directory
  • Web page that you can promote your business (remember – no deals or discounts in public forums!)
  • Social events/mixers
  • Welcome bags for new residents where you can provide samples
K = kid’s contacts

If you don’t have kids, you can still browse through this section because it might remind you of contacts from when YOU were a child!

  • Teachers
  • Coaches (and their spouses)
  • Friends’ moms
  • Friends’ older sisters
  • Volunteer parents (a little twosie gift bag makes a great little “thank you”!)
  • Day Care teacher

Here’s a quick graphic that I made to help serve as a visual reminder:

A simple reminder to help you build your FRANKs list!

Once you have a FRANKs list, start to connect.

  • Unless they are your bff’s – don’t dive right into the business. We’ve ALL had that random person that we haven’t talked to in 20 years reach out and try to sell us somthing. Yuck.
  • Decide on a set number of people per day you’d like to connect with, then connect!
    • Check out their social media profiles and see what they’ve been up to.
    • Send them a personal message (NOT about your business!)
    • Comment on a recent post.
    • Let them know you’ve been thinking about them.
    • Ask them a question!
  • The goal at this point isn’t to SELL or to get them to join you. It’s to CONNECT.
  • Write down or track who you reach out to so you can make it through your list!

Keep posting on social media!

Remember the five pillars we talked about in this blog post? Keep cycling through your list! The funny thing about social media is that the algorithms are smart. Once you’ve connected with someone via personal message, they’ll start showing you each other’s posts. So make sure you’re giving your old (and new) friends something to look at!

My friend Kimberly is in direct sales with another company, and she made a comment that “You shouldn’t have to rely on friends and family to keep your business afloat.” And while this is true, this is the most logical place to start. We call this your “warm market.” And the beautiful thing about connecting with people is that even a small group of people in your warm market, can introduce you to so many new friends and customers that are currently in your “cold market.” And making these new friends has been one of my favorite parts of building my business. I treasure these new friends and relationships so much!

Were you surprised when you wrote down your FRANKs list? Did you have more people than you expected? Let me know in the comments!