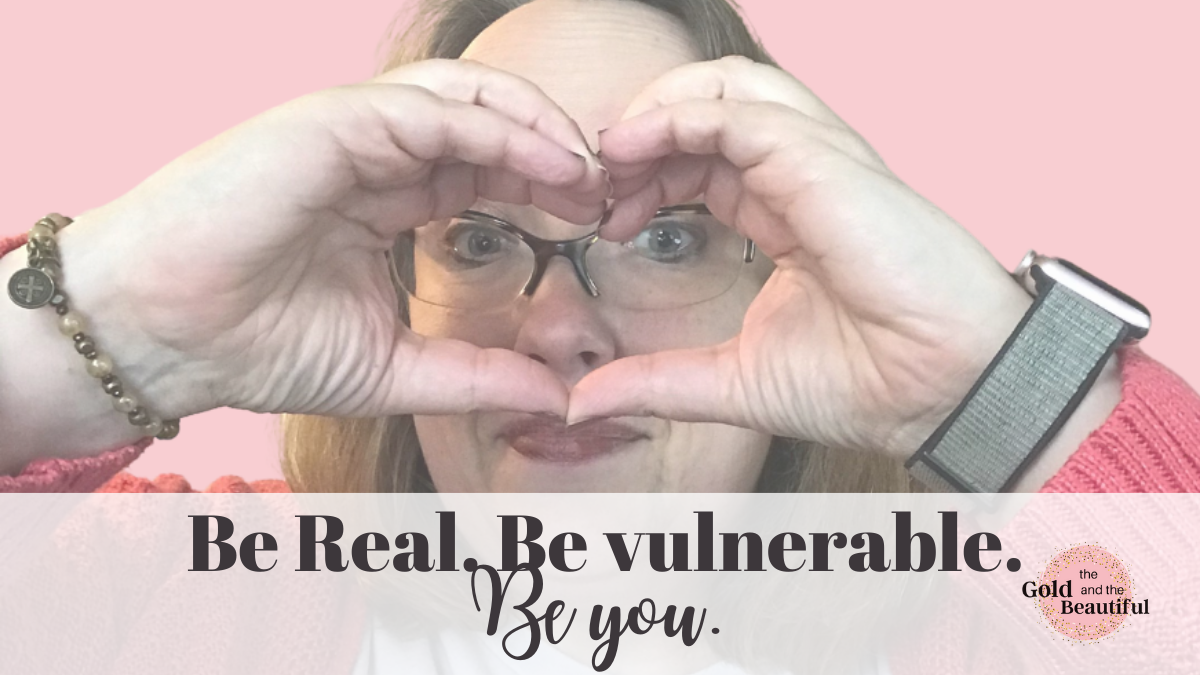
Social Media 101: Audit Your Profile

If you’re reading this now, chances are, you’re on some sort of social media. Whether you’re on Facebook, Instagram, Tik Tok, Pinterest, You Tube, Twitter, Clubhouse, all of the above, or something entirely different… I bet you’re on at least one of these! For the purpose of today’s blog, I’d like you to focus on your PRIMARY social media platform.

What’s in a profile?

Your social media profile is your virtual business card. It’s what people see when they are surfing. It’s where people go when they want to find out what you’re about. It’s basically your first impression on social media, so you want to make it a good one! Follow the steps below to do a quick audit and make some immediate changes to improve your online presence.

Step 1: Strike a pose

That’s right – your profile picture should be YOU. As cute as your dog is, or as precious as your baby is, when someone is scrolling you want them to recognize that it’s you and your profile. Ideally, this will be a headshot. No, it doesn’t have to be professional. Yes, it should be clear. And when you start to stress about finding a picture that’s glamour-shot worthy, remember, it’s more important that it look like YOU than that it’s “beautiful” by some artificial catfish-y standard.

What NOT to post!

Step 2: Pick 4-5 topics that represent “you.”

These will be the core of the content (the “pillars”) that you post on your personal page. That’s not to say that you won’t ever post about other things, but consider these the main things that you want to share with the world! Some people put these in their bio (I did) but I don’t actually recommend that. Mine began as “Church. Family. Work. Teach. Play. Repeat! ❤️” But over time, that shifted. As the kids moved out, my dog Buster became one of my main posting topics. Now that he’s passed away, that’s changing again. Maybe these 4-5 pillars are hobbies (sewing, crafting, cooking, camping, Disney, reading.) Maybe they are family or pets. Maybe they are religious. These can be anything, although if you are building a business, I’d steer away from controversial topics, even when they are important to you.

Step 3: Clean up controversy.

Speaking of controversial topics, take this opportunity to clean up your page. My assumption if you’re reading this is that you are building a business, and unless your business is for an extremely niched market, it’s probably not in your best interest to anger half of your given customer population at any point in time. So delete the rants, or change the privacy settings to share with a select few people in your inner circle.

Step 4: Check your privacy.

Depending on your life circumstances, you may want to be more or less public. If I had small kids at home, I might set up a smaller audience to share kid stuff. As it is now, my life’s an open book so almost everything is set to “public.” Yes, I get the one off stalker that I ignore, but if a friend/customer tags me in a nailfie, I want their friends to be able to click through to see what I’m all about. You can read more about general privacy settings and how to change the privacy on posts on the help pages of your platform of choice. (Here’s Facebook!)

Step 5: Ready, set, post.

Consistency is important! Unless you sell something that is critical to survival, what you have to remember is that most people will make purchases when they think about it (or when they think about you!) They won’t necessarily think about ordering each week or even each month. But when they see YOU and your amazing manicure, that will remind them!

Now let me be clear… you don’t need to (and you shouldn’t post) ONLY about your product. We’ve all been around people that are radio silent except for incessant posts about their products, and if you’re like me, you just scroll faster when you see those posts. I use the general rule that ~ 20% (probably a little less) should be about my business. So if I post five stories, I’ll post one that’s about my business or product. (Now, if my cute nails happen to make it into a post about something else, that’s just a happy accident!)

That said, you should try to post on your personal account regularly. Once you are in the habit of posting on your preferred platform, you can expand and start to incorporate additional platforms if you want to. My personal goal is:

  • Facebook (my preferred platform)
    • 1 to 2 posts per day
    • 3 to 5 stories per day
  • Instagram
    • 3 to 5 posts per week
    • 3 to 5 stories per week
  • Pinterest
    • 3 to 5 posts per week

On the horizon: Tik Tok! (I still haven’t totally conquored this one!)

Please note, these are on your PERSONAL profile, not any VIP group that you might have. Those are separate. But people do business with those that they know, like and trust. And letting them into your life is the way they can do that!

What’s your preferred platform? What are your five “pillars” that you’re going to post about? I’d love to hear from you in the comments!

Maximize Your Time: Start Time Blocking

For most of us, our to-do list is far longer than our hours in a day. But stop to think about some of the non-negotiables in your life: feeding your kids, going to the doctor, getting to work or school on time. What makes these different? It’s simple: you prioritize them AND you have a designated time to do them.

What is Time Blocking?

Time Blocking is the act of scheduling your day. It’s taking your traditional “to-do” list but assigning specific, and limited, times to complete each task. It should be written down, and you should treat each item as a non-negotiable item.

What items should be blocked on my schedule?

For time blocking to be effective, you should map out EVERYTHING! This includes:

  • Meetings
  • Appointments
  • Sleep
  • Travel Time
  • Work Time
  • Family Time
  • Meal Prep
  • Eating
  • Laundry
  • Relaxation
  • etc.

Have you ever had a day where you have back to back meetings with NO BREAK? It doesn’t work, does it? At some point during the day you have to allow yourself time to eat, to use the restroom, to sleep. And if you don’t plan time for these things, they’re going to happen at the expense of something else!

What does an example of a Time-Blocked day look like?

Here’s an example of what a “typical” work day looks like for me. It includes time for work, personal activities, and my Color Street business. I have a planner that I love to use that has an hour by hour schedule, but you don’t need anything fancy. A piece of paper and a pencil works just fine!

TimeActivityComplete?
4:45 amWake up, drive to gym
5:00 – 5:30 amWorkout
5:30 – 5:45 amDrive home
5:45 – 6:30 amShower, get dressed, dry hair
6:30 – 7:30 amColor Street – Create & Schedule Content
7:30 – 8:00 amBreakfast, Empty Dishwasher
8:00 – 11:00 amWork (this is usually broken out by specific meetings)
11:00 – 11:30 amLunch
11:30 am – 2:30 pmWork
2:30 – 2:45 pmBreak
2:45 – 5:30 pmWork
5:30 – 6:30 pmAfternoon walk/phone calls
6:30 – 8:00 pmDinner & family time
8:00 – 9:00 pmColor Street (team time, 1:1 follow up, parties, etc.)
9:00 – 9:30 pmWind Down
9:30 pm Bedtime
Example: Time Blocked Work Day

Within each of these large sections, I block even more. So for example, my 8:00 – 9:00 pm Color Street time might be blocked as follows:

TimeActivityComplete?
8:00 – 8:15 pmCheck in with 5 members of current team
8:15 – 8:30 pmTalk to 2 prospective teammates
8:30 – 8:45Prepare party hosts – send day 3 coaching
8:45 – 9:00Talk to 2 prospective party hosts for next month
Example: Time Blocked hour: 15 minute increments

You can even break down your hour into what we call “Power Hours” in 5-10 minute increments, but that will be a post all of it’s own later!

Why Time Blocking?

Besides being a simple and efficient way to plan your day, think about the qualities of “SMART” goals:

  • Specific: You are listing out specific things that you need to accomplish
  • Measurable: If you notice in my Color Street hour, I added very measurable goals. So for example, if I only checked in with 4 members of my team, then the next day I would try to do six instead of five…
  • Attainable: You only have 24 hours in a day; this helps to ensure you don’t over commit!
  • Realistic: I used to be TERRIBLE about not allowing for travel time. I’ve always wanted the ability to teleport, but until that can happen, this method makes sure that my schedule is realistic!
  • Time Bound: This is the real differentiator here. Time Blocking makes your task list time-bound, so you’re far less likely to procrastinate. It sets a limit so your unpleasant tasks don’t go on indefinitely, and it saves us from that bad habit of doing what we enjoy for much longer than is necessary or productive!

Call to Action:

Give it a try! Time block a day in your schedule and drop it in the comments below! I’d love to hear how it works for you!

Why host a Color Street Party?

When I was first introduced to Color Street, I didn’t want to attend a party. I had horrible memories of failed in-home parties from my youth, and I didn’t want any part of it. It’s sort of like silent auctions. I always swore I hated silent auctions until my husband signed us up to run the one at our church. I realized that when I was in charge of them, I LOVED the stuff that was available to bid on, and suddenly silent auctions were awesome sauce! And it was the same with Color Street parties. I realized that there are so many different types of parties that there are plenty that are SO. FREAKING. FUN. So without further ado, here are my top three reasons to host a Color Street party!

Earn host rewards!

If you’re like most of us, your wish list is much larger than your bank account. I would buy ALL THE NAILS if I could! Hosting a nail bar/beauty social is a great way to earn discounted products. Here’s how it works:

Host rewards as of 7/21/21

So, let’s say that you have a party and ten friends bought a B3G1 deal with a solid, a glitter, a design, and a glitter design.

In the US, that would be $380 in sales (($0+$12+13+13)*10). In Canada, that same party would be $482.50 (($0+$15.25+$16.50+$16.50)*10).

You would earn 15% of those sales as host credit and also earn three half-price items! So here’s how the math would work. (Of course, the actual nails earned will depend on what styles you pick!)

USCanada
Solids – 2 ($11 USD, $14 CAD)$22.00$28.00
Glitters – 2 ($12 USD, $15.25 CAD)$24.00$30.50
Designs – 1 ($13 USD, $16.50 CAD)$13.00$16.50
Glitter Designs – 2 ($13 USD, $16.50 CAD)$26.00$33.00
Subtotal$85.00$108.00
Minus three 1/2 price items-$17.00-$21.63
Minus 15% host credit– $57.00-$72.38
Total due (for 8 sets)$11.00$13.99

Share Color Street with friends!

It makes me so happy when my friends and family try Color Street and love it as much as I do! My cousin is a nurse and was THRILLED to cut down her weekly manicure routine from hours to less than a half hour — and have a mani that stands up to all the sanitizing! Just yesterday a co-worker called me and said she couldn’t believe that these lasted as long as her gel nails, but that she could get four manis for the price she was paying for one!

With new releases ALL THE TIME, there’s always something new to share with your friends, and if you’re in Canada, you could be the first to introduce the busy women and mamas in your life to this game changer!

Have fun!

I know that it sounds silly, but parties can be fun! We can do them online or in person. We can do zooms, messenger, or Facebook. Really, if you can dream it, we can do it! (I’m currently working on an escape room party and a murder mystery party!)

What do you like to do with your friends? What do you find fun?

The possibilities are endless. (I think my favorite so far has been a “wizarding” theme because I’m a HUGE Harry Potter fan.

But my point is – a Color Street nail bar is all about YOU and your friends and what you all enjoy!

How to get started…

I’d love to host a party for you and your friends! The best way to get started is to join my VIP group here:

When you answer the membership questions, just let me know you’d like to host a party and I’ll contact you to work out the details!

My calendar is filling fast, so if you want to snag a spot, let me know asap!

Commissions and Incentives

If you are considering becoming a Color Street stylist, you’ll want to know how you can earn money. I’ve done my best to provide a simple overview, but the full compensation plan should always be reviewed online in the official Color Street policies and procedures. This is not an official policy, but simply my summary to try to provide an overview!

Before you read further, you should review the Income Disclosure statement for your country:

I’ve said it before, and I’ll say it again: Color Street is not a “get rich quick” gimmick. It’s a business opportunity that takes work, but it is one of the most rewarding and fun things I’ve ever done! It’s worth it!

So let’s get down to basics. There are multiple ways you can earn income as a Color Street stylist.

Base Commission

As of July 2021, your base commission is 25% of your Personal Volume (PV) multiplied by the exchange rate.

The purchase of one set of Tokyo Lights (#1 bestseller!!) earns a stylist 12 PV. (The retail price of this is $12.00 US or $15.25 CAD.) Commission on this sale would be: calculated as:

% CommissionExchange RateCommission
USA25%1.0$3.00
Canada25%1.27$3.81

Using another example of a “buy 3, get 1 free” set that includes a solid, glitter, design, and glitter design:

USARetail PricePV% CommissionExchange RateCommission
Solid$0.00 (B3G1)025%1.0$0.00
Glitter$12.001225%1.0$3.00
Design$13.001325%1.0$3.25
Glitter Design$13.001325%1.0$3.25
Subtotal$38.003825%1.0$9.50
Example based on prices and exchange rate in July 2021.
CanadaRetail PricePV% CommissionExchange RateCommission
Solid$0.00 (B3G1)025%1.27$0.00
Glitter$15.251225%1.27$3.81
Design$16.501325%1.27$4.13
Glitter Design$16.501325%1.27$4.13
Subtotal$48.25$12.07
Example based on anticipated prices and expected exchange rate in July 2021.

Your base retail commission is paid weekly!

Additional Ways to Earn: Marketing Phase

In addition to your base retail commission, there are two other ways you can earn by simply selling this amazing product. (This sales activity is called the “marketing phase.)

Jump Start Bonuses

Color Street rewards new stylists for hitting sales and enrollment goals within their first 95 days as a stylist. There are different levels that you can reach at 35, 65, and 95 days, and each one allows you to earn product credits.

Enhanced Retail Commission

Enhanced retail commission allows you to earn additional commission paid monthly. This is calculated based on a sliding scale of PV, and with it, you can earn up to 10% additional on top of your base retail commission.

The Leadership Phase

The leadership phase pays bonuses based on the sales of your team. There are four different types of leadership bonuses.

Enroller Matching Jump Start Bonuses

When your new stylists earn their jump start bonuses, you earn the product credits as well!

Enroller Bonuses

When you are bonus qualified (meaning you’ve reached 300 PV in a month) then you also earn a 3% bonus on your team members’ PV. I won’t go into detail here, as this bonus extendsinto different levels of your organization based on your own rank in the company.

Leadership Level & Leadership Depth Bonus

This is additional income earned from other levels within your organization. The full chart is outlined in the Color Street compensation plan and the Road to Success handbook that comes in your new stylist welcome kit.

The Executive Phase

The executive phase of the compensation plan rewards you for mentoring other emerging leaders. This is additional compensation that’s available once you’ve reached the rank of Executive Director and above.

There are many training opportunities available to walk through the incentive and commission plan, but I hope this served as a helpful overview. I love the fact that there are both retail/marketing channels AND leadership channels available, so you can do one or both and still be successful! And there are no minimum sales requirements, so you can grow at your own pace!

If you would like more information, feel free to contact me, and I’ll be happy to answer any questions you might have!

Color Street is coming to Canada!

Color Street dry nail polish is coming to Canada very soon (on August 9th to be exact), and I couldn’t be more excited! If you haven’t heard of Color Street, you can learn more about what it is in a prior blog post:

Here’s a quick recap for Canada:

  • Color Street is 100% real nail polish, but it goes on dry.
  • No heat or tools are required, so you can apply them anywhere – in the car, on a plane, or even while you’re cooking dinner! Stop to change a diaper, pet your dog, or type an email mid-mani!
  • Each set will be between $14-17.75 CAD, and there will be specials available on the website. Solids, clear nail art, glitters, and designs are all buy three, get one free. French are buy one, get one free.
  • You can use them on fingernails or toenails (though there are some slightly larger “pedicure” sets available) and color usually lasts about 7-10 days.
  • This is a game changer because you get a long-lasting, salon-quality mani but you can do it AT HOME for a great price!

I’m so excited to share this with my friends in Canada. We lived in Mississauga for about three years from 2008-2011, and it was one of my favorite places. Can I just say that milk in a bag is the best?

There are three ways that I’d love to introduce you to Color Street. I’ve outlined each below, OR if you’re more of a You Tube person, check out this video for my overview!

#1- Join the team!

I have always watched people who “start” new things and it seems I’m always running behind. This is our chance to be the FIRST to introduce this amazing nail polish to a whole new country! And it’s a product that we KNOW brings beauty, sparkle and fun to busy people everywhere!

New stylists can sign up starting August 9th and begin earning commission immediately. All sales are done through the website, so you don’t have to stock up on inventory. Start earning 25% commission on your PV (personal volume) right away!

The only up front cost is the new stylist welcome kit, and it will be $159 CAD plus tax and shipping. It includes:

  • 12 sets of manicure strips
  • 1 set of pedicure strips
  • 72 two-finger testers
  • 40 nail polish remover pads (though any nail polish remover works!)
  • 2 large nail files
  • 2 nail buffers
  • 60 mini nail files
  • 50 cuticle pushers
  • 25 catalogs
  • 25 opportunity brochures
  • Road to Success handbook
  • Tote bag

Ongoing, there will be a $12.50 CAD e-suite fee that maintains your website for customers to order, and that’s it!

There is no minimum you have to sell, and you are not required to build a team (although that’s awesome too and can provide even more ways to earn!)

I’ll share another blog post soon with the ten different ways that you can earn money with Color Street, but honestly, I’ve gained so much more than income. I’ve gained friends, confidence, and had so much FUN building my business. The income was actually a surprise and a great perk for me, personally!

Of course, there are no guarantees regarding income. This estimate is subject to change after the first six months of our operation in Canada and will be updated annually thereafter. A Stylist, for the purposes of this estimate, includes all Stylists who make a sale of Color Street products within a one-year period. Color Street’s estimate of what the typical participant is likely to earn is between $0 and $99 CAD per year. This “typical” figure is representative of the smallest range of compensation expected to be earned by over 50% of all Stylists in the plan.

To sign up, you can enroll with any current stylist. My own personal enrollment link is below, but remember, if you are in Canada, you cannot enroll until August 9th!

If you’d just like to get more information about becoming a stylist, I’ve created an “FAQ” group just for you! Check out our Facebook group here:

#2- Host a party!

If you’re not quite ready to join the team but are super excited to try and share these dry nail polish strips, you can host a party! This is an easy and fun way to get some sparkle time with your friends while earning discounts on your own nail strips!

Parties can be done in so many different ways. My personal favorite is to host a party on Facebook, but we can also do Zoom, Messenger, and more!

Think of it like hosting a party at your home, but without getting dressed up, cooking, and cleaning the house! You invite your friends, and we have fun, games, and share these nail strips! When your friends and family buy their own nail strips, you can then earn host rewards!

Here’s a snapshot of the host rewards as of 7/16/21:

Canadian host rewards as of 7/16/21

To host a party or get more information on hosting, join my Facebook group:

When you answer the membership questions, you will have the chance to request more information about hosting a party!

#3- Request a two-finger tester!

If you’d like to try Color Street for yourself, feel free to request a two-finger tester so you can put Color Street to the test! Wear it alongside your regular nail polish and see how it holds up!

Request your two-finger tester here:

I am so excited to share this nail polish with you. It sounds strange to say this, but Color Street really has changed my life in so many amazing ways. I didn’t think I had time to paint my nails, much less build a business. But as I’ve learned, even busy people need time to sparkle!

I look forward to hearing from you!

Love,

Amelia

2021 Income Disclosure: United States

With Color Street, you have an opportunity to earn income on the
sale of Color Street products to consumers. However, your earning capacity
depends on a number of factors including, but not limited to, your personal
commitment, hard work, sacrifice, market conditions, and your business skills.

Please review the full income disclosure here that shares specific earnings by Color Street stylists in 2021.

It is a pet peeve of mine when I hear people say “Color Street sells itself.” It does NOT. I sell it. And I work really hard at it.

Is it fun? Yes.

Is it worth it? Absolutely.

But it’s not easy, and Color Street is exactly right. There are so many factors that can influence your success. To be honest, I was surprised at the income I’ve earned. I didn’t expect it. But I was even more surprised at how much more I’ve gotten out of this business. I’ve regained a sense of pride in what I do. I’ve gained so many friendships. I’ve gained confidence. I’ve added so much fun to my life.

I hope you join me and see just what you can gain from your own Color Street business. If you’re ready to join, you can sign up here:

Or if you’d like to get to know our larger team a little better and still have questions, check out our “Behind the Scenes” group for Team Polish Princesses here:

Income Disclosure: Canada

There are no guarantees regarding income. This estimate is subject to change after the first six months of our operation in Canada and will be updated annually thereafter. A Stylist, for the purposes of this estimate, includes all Stylists who make a sale of Color Street products within a one-year period. Color Street’s estimate of what the typical participant is likely to earn is between $0 and $99 CAD per year. This “typical” figure is representative of the smallest range of compensation expected to be earned by over 50% of all Stylists in the plan.

From a personal standpoint, I don’t want any stylist to believe that this is a “get rich quick” opportunity. I love the disclaimer that we are required to provide in the United States. It calls out that many things affect our success including hard work, business skills, market conditions and more. Is it easy? No. Is it worth it? Absolutely. I’ve gained so much more than money by being a Color Street Stylist. I’ve gained confidence, friendships, business skills, beautiful nails, and so much more.

I hope you’ll choose to find out from yourself all that you will gain by joining this amazing team!

When you are focused on the negative, there’s no room for the positive.

It goes by many names. Positive thinking. Manifestation. Good vibes. And I’m not a scientist nor a new age expert, so I have no proof that it works. But I’m 100% certain that it does. And whatever your goals may be, the most important step in realizing those goals is by focusing on the positive aspects of your goal.

To be honest, I’m not sure I have the word to properly articulate this, but I’m going to give it a try.

For a moment, let’s talk about something not business related. Think about the last fight you had with your spouse or child. I’m going to use a silly example. I have one of those built-in hampers in the bathroom – you know, the cool ones where there’s a hinged door that you put your clothes in, and then they drop into a basket or cabinet below? Anyway, the hinge broke, and I asked my darling husband to fix the hinge. I know from experience this will probably take him less than 10 minutes to do, but for him, it hadn’t been a priority. Every day, I would ask him about it, and every day, he’d say he would do it. Then every night, I’d go to put my clothes in the hamper and I’d get annoyed all over again. What happens when we get annoyed? Our brains like to dwell on that. Mine, in particular, has claws of steel that latch onto negative ideas and like to grasp onto the smallest negative idea and poke it and prod it until it swells up and takes over everything. This small little thing was starting to blow up in my mind to “Why doesn’t he think my needs are important?” (Which was ridiculous. But no one ever said our emotions are logical.)

Here’s the kicker. My GOAL wasn’t to get the hinge fixed on my cabinet. In fact, I couldn’t care less about that particular hinge. My goal was to have someplace to put my dirty laundry that didn’t annoy me. But I wasn’t focusing on that. I was SO FOCUSED on this small bit of negativity that I was spending zero time on anything productive that could actually solve the problem.

When I took a step back, acknowleged my frustration, and then let it go… I started putting my clothes in his hamper. And guess what… not only was I no longer annoyed, but this was a better solution for me. It was fewer steps for me. It meant fewer trips when I had to carry the laundry to the washing machine.

So now let’s think about a business goal. Perhaps you want to grow your team, and it’s not growing as fast as you’d like. Maybe you’ve set your goal to add two new people to your team in a month, and you didn’t add anyone. Now, that negative “hamper voice” is saying “You didn’t meet your goal.” That leads to thinking about all the things you think you did wrong. Or perhaps you go down the path of all the things you didn’t do. Or perhaps you start lowering your goals and telling yourself that the last ones weren’t attainable (and then thinking about all the reasons why.)

Here’s why that’s a problem:

  • From a business perspective, every minute you spend on a negative action/thought is a minute that you aren’t spending on a positive activity. We all have the same 1440 minutes in a day. Do the math. The more you wallow, the less you get done.
  • From a mindset perspective, not only are you now less productive, but you’ve surrounded yourself and your goal with all of those negative vibes. And say what you will, but the energy and vibes around you are absolutely a real thing. And they do affect us.

So take a step back. Your goal isn’t really to add two people to your team. Sure, that’s a goal that you set, but it’s an arbitrary number. What’s your “why?”

  • Maybe your goal is to share your love of a product and service with people. Guess what – when you are obsessed with why your team isn’t growing, you’re not sharing your love of your product or service. When you ARE sharing that love, people can feel it. They feel your enthusiasm (not your dejection) and … here’s the kicker, they’re going to want to join your team.
  • Maybe your goal is to make more money or earn a leadership bonus. Guess what – when you are obsessed with why your team isn’t growing, you’re not looking at the different ways you can make money. (My company has at least 12 or 13 different ways you can earn!) Once you focus on how you CAN make money (even before having the growing team) then people will see that. Again, they feel your enthusiasm; they see your results, and … (see where I’m going with this?) They want to join you.
  • Maybe your goal is to earn recognition. When you are obsessed with why you didn’t meet one goal, you’re not looking at the other ways you can earn recognition. And… once you do earn recognition, people will see that. People will feel your enthusiasm. And – yep – they’ll want to join you.

Another way to say this is: when you are focused on the negative, there’s no room for all the positive.

So, how do you combat this?

  1. Continue to make goals, especially big, challenging goals! They are fun, and they’re exciting. And they are important to help you set the pace for your business. Goals are the stepping stones to help you get to your “why.” (They’re just not the ONLY way.)
  2. When you set your goals, focus on the activities that are important to reach them. If you know you want to sell $2400 in product in a month, but you aren’t doing the things needed to make sales, then you’re not going to hit the goal. (Nothing new so far, right?)
  3. Here’s where it gets different. CELEBRATE the activities that are important to your goals. Most of us have several things that we do to make our business successful. (I’m sure I’ll post later about DMOs or “daily methodds of operation.” Just because you haven’t hit your goal yet, you’re DOING ALL THE THINGS! That’s awesome! Enjoy them! Keep doing them! Get others to do them with you!
  4. When you see the negative talk start to “hamper” you (see what I did there?) just acknowledge it. Then focus on what positive things you can do! Then repeat #3. Do them and celebrate them.
  5. If you don’t know what to do, or what you do is consistently not working, then try something new! Ask your leadership, look for training, and don’t be afraid to try something else! As I learned with the hamper, there is more than one right way to do anything.

A therapist once aptly pointed out to me that we can’t control the behaviors of other people. We can’t always control our circumstances. But the one thing we can ALWAYS control is our response to those. There’s a quote out there that puts it quite well (source unknown.) It says, “You can choose to complain because roses have thorns, or you can celebrate because thorns have roses.”

What will you choose to look at?

Seven Steps to a Successful Launch

Usually, stylists do not know any details about upcoming launches until right before the new products arrive. Because of this, it’s always good to have an “SOP” or standard operating procedure in place so you can react quickly. Below are the steps I take with each new launch.

Step 1: Change your VIP group header graphic.

Because the name of my group is “The Gold and the Beautiful” my standard background is a pink and gold glitter. As soon as I know something new is coming, I change that to something that will be consistent with the theme. It always includes four components:

  • The name of my group
  • A themed background
  • My photo
  • My linktree link

Here are a few examples of recent ones I’ve done:

Americana Collection – May 2021
Retro Pop – April 2021

(And yes, that’s 80’s me in the second one.) As soon as I change my header, members of my VIP group start buzzing that something new is coming, so it’s a quick and easy way to start building engagement!

Step 2: Plan a fun engagement game for the night before the launch.

This can be anything that encourages people to participate and gives even more hints about what’s coming! If you are members of the graphics groups on Facebook, there are usually posts that appear right as a new launch happens specifically for people to post related graphics. Some of my favorites include:

  • Gif games (When we get X gifs, I’ll release a picture of a new set)
  • Word scrambles
  • Trivia related to the theme
  • This or That (but not with the new nails yet – with something related to the theme)
  • Guessing games or Draw your own nail

Ultimately, choose whatever fun games you and your VIPs enjoy, because the goal is to get as many people active as possible so they will see your launch posts!

Step 3: Preview with your top contributors or individuals you think will especially like the sets.

Everyone loves to feel special, and everyone likes to get the “MVP” treatment. If you have a great customer who loves glitters, pull them aside and give them a sneak peek of the new glitter that’s coming out, and offer to order it for them! If you know in advance that something is coming (like a spring launch, fall launch, or holiday sets) then set up a zoom with your top contributors. We don’t always have time to do this, but when you can, it’s a win-win. It makes your customers feel special and it can result in some early sales for you! Please note, you are not allowed to do this until you receive the approval and assets from Color Street!

Step 4: Announce the new sets in your VIP group.

If you have time, and you are creatively inclined, it’s great to create your own graphics. (Remember, you can’t altar or change any Color Street images that have their logo on them!) However, the Corporate HQ always provides a great variety of different images and media you can use and there are always wonderful graphics available in the graphics groups too! Be sure you let your customers know:

  • When the sets will launch
  • How to order (shopping link, bulk order, etc.)
  • Any specials you may be running (remember, you can only offer specials or deals in your CLOSED VIP group!)

Step 5: Send an email from the virtual office.

Let’s face it: not all your customers are IN your VIP group, and even those who are may not ALWAYS see your posts! Sending an email makes sure that ALL of your customers know about what’s happening! Even though Color Street sends their own emails, remember, they only send the emails to the last person a customer bought from. So if one of your customers purchased from a friend’s party with another stylist, they will get an email with a link to THAT stylist’s shopping link! So it’s always good to send your own email. Plus, it gives you the opportunity to share about things going on in your VIP group or other happenings!

Step 6: Follow up!

The more you can connect with individuals, the more successful your launch will be! This can be done a number of different ways:

  • Follow up with recent orders. “Hey, Susan! I know you just ordered last week, but I wanted to make sure you don’t miss out on the Americana set for the 4th of July! Since you just ordered, would you like me to add a set or two to my order for you?”
  • Follow up with ALL open parties. “Hey, Lindsay! Your party link is still open, and there’s a new line coming out tomorrow! It’s a great chance to earn extra hostess rewards (or get your party to qualify for hostess rewards!) Remember – any orders your guests or you place will count! Can you think of a few people to send the link to that might love these?”
  • “Hi Jackie! I know you haven’t ordered in a few months, and thought now might be a good time to replenish your stash since the new “Set in Stone” collection just launched. Have you seen these gorgeous nails?”
  • “Happy Thursday, Rebecca! I know that you LOVE dressing for the holidays so I wanted to make sure that you saw these super cute Easter nails! Would you like me to grab any for you?”

Step 7: Keep the excitement coming!

After the launch, you can keep the excitement growing by sharing your own enthusiasm. Again, there are so many ways you can do this.

  • This or That with the new sets.
  • Live unboxing when you get your order.
  • Giveaways. I love coming up with fun and creative giveaways for my group. For example, with the Retro Pop collection, I gave out scrunchies, glitter bracelets and slap bracelets. With the Set in Stone collection I gave out marbled feaux leather earrings. For my “mermaid week” I gave out mermaid tail earrings. Remember, you may not do (or discuss) any giveaways in a public forum!
  • Specials/Games like a live sale, mystery set live, or secret nail sales. (Again – only in your closed VIP group!)
  • Modeling the new nails. A lot of stylists will wear sets early simply so they can show off how gorgeous they are!
  • Finding nailfies of the new sets by other stylists. Sometimes the corporate graphics may not resonate with someone, but once they see the nails in different lighting or on a different skin tone, they fall in love with them. Mixed manis can also catch people’s eye!
  • Keep customers informed as sets sell out. There’s always FOMO – fear of missing out. Perhaps they had forgotten to order, but when one of the sets sells out, they will remember that they need to get their order in before it’s too late!

The great thing about these steps is that it’s never too late to do them. Even if there’s already been a launch, you can still do all the things to make it fun, special and exciting for your VIPs.

If you’d like to print off a checklist that you can use this:

And if you are a trello fan, feel free to use this free template:

Having a plan that you can use for each new product launch will save you the stress of last minute preparation, and it will help ensure your launch is successful.

What tips and strategies do you use for a new launch? Let me know in the comments!